
Every old deck reaches the same point. The boards are soft in places, the railing wobbles when you lean on it, and the stairs have developed a personality. You could keep patching it, or you could tear it out and start fresh.
Deck removal is one of the more satisfying weekend projects a homeowner can take on. It is physical work, but it is not complicated, and you can do most of it with tools you already own or can rent for a day. This guide covers how to decide whether to repair or remove, what to check before you start, the fastest way to take a deck apart, what to do with the footings and the treated lumber, and how to size the bin.
Repair or remove?
Not every tired deck needs to come out. Surface problems like weathered, cracked, or loose boards can often be fixed by replacing the decking alone. Railings can be rebuilt.
The deck should come out when the problems are structural:
- Soft or rotted joists, beams, or posts. Push a screwdriver into the wood; if it sinks in easily, the wood is failing.
- A rotted or poorly attached ledger board, the board that connects the deck to the house. This is the most common cause of serious deck failures.
- Posts that lean, footings that have heaved or sunk, or a deck that sways when people walk on it.
- A deck that was built without proper footings, or that simply was not built well to begin with.
If you are unsure, have a contractor or home inspector look at it. A deck that fails with people on it is not a risk worth taking.
Before you start: permits, utilities, and the ledger
Taking a deck down rarely needs a permit, but check with your municipality if you live in a heritage district, or if the deck is part of a required pool barrier or the only exit from a door.
If you plan to dig out the footings, call the Ontario Dig Authority, formerly Ontario One Call, before you dig. Locates are free and required before excavation in Ontario, and gas, electrical, and communication lines often run right beside a house.
Disconnect anything powered or plumbed into the deck: lighting, outlets, and natural gas lines to a barbecue. Electrical work should be done by a licensed electrician, and gas lines by a licensed gas technician.
Pay special attention to the ledger. When it comes off, you will be looking at the side of your house, where the ledger was bolted or nailed to the rim joist. Plan to inspect that rim joist for rot, and to repair the siding, house wrap, and flashing afterward so water cannot get in.
Plan the day before you pick up a saw
A deck comes apart faster than most people expect, and the debris piles up faster still. Ten minutes of planning saves an hour of shuffling lumber around the yard.
Decide where the bin goes before it arrives. The best spot is the closest point to the backyard that a truck can reach safely, usually the end of the driveway nearest the side gate. Walk the path you will carry lumber along: through the gate, around the garden, across the lawn. If the gate is narrow, take it off its hinges for the day.
Set up a cutting station near the bin, not near the deck. Long joists are awkward to carry and awkward to load, so it is easier to carry them whole to a pair of sawhorses beside the bin and cut them into lengths there. Shorter pieces stack flat and pack tight.
Line up help for the heavy parts. One person can strip boards all morning. Lowering a beam or wrestling a set of stairs off the house is a two or three person job.
Finally, tell the neighbours. A deck tear-out is loud for a day or two, and a quick heads-up goes a long way, especially if your saw will be running beside their fence.
Tools for the job
You will want:
- A circular saw and a reciprocating saw, with demolition blades that tolerate nails.
- A flat pry bar and a long wrecking bar.
- A sledgehammer and a regular hammer.
- A drill or impact driver for screws.
- A cat's paw or nail puller.
- A wheelbarrow, for carrying lumber and concrete.
- A magnetic sweeper, for the nails and screws.
- Heavy gloves, safety glasses, hearing protection, and steel-toed boots.
The order of demolition
Take the deck apart in roughly the reverse order it was built:
- Railings and stairs.
- Decking boards.
- Joists.
- Beams.
- Posts.
- Footings.
Two safety rules apply throughout. Never cut a post or beam while it is still carrying the load above it. And always think about where a piece will fall before you cut it, so you are never standing on, under, or beside something that is about to drop.
Stripping the deck boards fast
Prying up deck boards one at a time, especially screwed boards, is slow and frustrating. There is a faster way.
Set a circular saw to cut just through the thickness of the decking, and cut each board alongside the joists, so every board is sliced into short sections between joists. Then knock the sections loose with a hammer or pry them up. Use a blade rated for cutting through nails, and wear eye protection, since you will hit fasteners.
If the boards are screwed down and the screw heads are in good shape, an impact driver in reverse can back them out instead. If the heads are stripped or rusted, the saw method is far quicker.
Joists, beams, and posts
With the boards off, the frame is exposed. Joists are usually held with metal joist hangers at each end. Cut them free with a reciprocating saw, or pull the nails from the hangers, and cut longer joists into lengths you can carry.
Beams are heavy. Support them with temporary blocks before you cut anything that holds them up, and get help lowering them.
Posts can be cut at the base. Posts set into concrete either need to be dug out with the footing or cut flush with the ground.
Taking the ledger off the house
The ledger is the last piece of framing to come down, and the one that needs the most care, because it is attached to your house rather than to the deck.
Ledgers are usually fastened with lag screws, through-bolts, or, on older decks, a row of nails. Back the lags out with a socket wrench or impact driver if you can. If they are seized, cut them flush with a reciprocating saw and a metal blade, working between the ledger and the house. Pry the ledger off gently, a little at a time along its length, so you do not tear the siding or crack the rim joist behind it.
Once it is off, look closely at what was behind it. Dark staining, soft wood, or crumbling sheathing on the rim joist means water has been getting in, often for years. Probe it with a screwdriver. Surface staining is common and usually harmless; wood that is soft to the touch should be repaired before the wall is closed up. If you are not comfortable judging it, this is a good moment to call a contractor, while everything is exposed.
Cover the area with house wrap or a tarp the same day if you are not finishing the siding right away. An open wall in an Ontario rainstorm is how a one-day deck job turns into a basement water problem.
Footings: dig, cut, or leave
Concrete footings come in a few forms, and the right approach depends on your plans for the space:
- Poured piers below grade can often stay in the ground, cut down flush or below the surface, if they will not be in the way of whatever comes next.
- Piers that would interfere with a new patio, garden, or deck need to be dug out and broken up.
- Precast deck blocks simply lift out.
Concrete goes in a clean-fill bin rather than a regular bin, because it is so heavy. Our dirt and concrete service handles this, and our guide to concrete disposal explains how clean-fill bins work.
Treated wood: handle with care
Most deck framing is pressure-treated lumber. Decks built before the mid-2000s were often treated with chromated copper arsenate, or CCA, which contains arsenic. Newer treated wood uses copper-based treatments. Either way, handle it sensibly:
- Wear gloves, and wash your hands before eating or drinking.
- Wear a dust mask when cutting, and do not let sawdust collect in vegetable gardens or areas where children play.
- Never burn treated wood, in a fire pit, a wood stove, or a bonfire. Burning releases toxic chemicals.
Treated lumber can go in a rental bin with the rest of the deck debris.
Composite and PVC decking
Composite and PVC deck boards do not rot, but they do fade, stain, and sometimes warp. Most composite decking ends up in landfill, since it is a mix of wood fibre and plastic that is hard to separate. Some manufacturers have run recycling programs for their own products, so check if your decking carries a known brand. Otherwise, it goes in the bin like everything else.
Nails, screws, and cleanup
An old deck leaves hundreds of nails and screws behind, many of them in the grass. Run a magnetic sweeper over the whole work area, including the lawn, before anyone walks there barefoot or mows. Keep a bucket for fasteners as you work, rather than letting them drop.
How much debris a deck makes
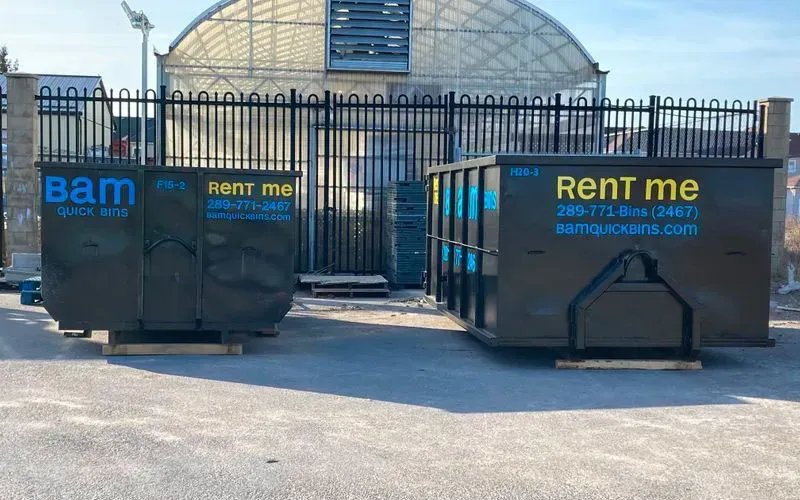
A typical 12 by 16 foot deck, broken down and loaded carefully, usually fits in a 10-yard bin. Large, multi-level decks with long stair runs, privacy screens, and built-in benches can push into 15 or 20-yard territory.
Watch the weight. Pressure-treated lumber is heavier than it looks, especially when it is wet, so even a mid-size deck can approach the 1 metric tonne of disposal included with a standard rental. Concrete footings push the weight up quickly, which is why they belong in a separate clean-fill bin. Our guide to dumpster weight limits explains how to plan for it.
Our residential rentals put the bin on boards right in your driveway. Have it placed as close to the backyard as the truck can safely reach; you will be carrying a lot of lumber.
Salvage and reuse
Old pressure-treated boards are rarely worth saving. They are weathered, full of fastener holes, and often split. Composite boards and hardwood decking in good condition sometimes find new homes through local listings, especially for smaller projects like garden boxes or shed ramps.
Doing it yourself or hiring it out
A deck tear-out is one of the better jobs to do yourself. The skills are basic, the tools are cheap to rent, and most of the cost of hiring it out is labour. A reasonably fit pair of people can usually take down an average single-level deck in a day, and spend part of a second day on footings and cleanup.
Consider hiring help when the deck is high off the ground, when it is attached to a second storey, when it sits over a walkout where falling lumber could hit glass, or when the frame is so rotten that you are not confident it will hold you while you work. Elevated decks are where most of the real danger lives, because you are cutting things that hold up the platform you may be standing on.
A middle path works well for many people: hire a contractor for the elevated or structural part, and do the stripping, hauling, and cleanup yourself.
After the deck
Once the deck is gone, you may find dead grass, bare soil, or a gravel base underneath. Rake it level, then decide what is next: a patio, a garden, a new deck, or simply grass. A new deck will need its own footings designed to current standards, so plan for that rather than reusing old ones.
If there is a hot tub on the deck, our hot tub removal guide covers that part of the job, and our shed removal guide covers the backyard structure that often comes down at the same time.
Where we help
We deliver bins for deck removals across southern and eastern Ontario, including Burlington, Ancaster, Newmarket, Aurora, and Whitby. Tell us the size of the deck and whether the footings are coming out, and we will help you choose the right bins.